By early 2026, autonomous AI agents have fundamentally changed the approach to personal and corporate automation. The OpenClaw platform represents a powerful open-source tool capable of gathering information from the internet and independently executing system commands through its built-in functions. Understanding how to technically install the OpenClaw environment correctly is crucial to ensure its stable background operation. This article provides a detailed breakdown of how to safely download the necessary packages and configure the intelligent OpenClaw agent for individual user tasks. This comprehensive installation guide for the OpenClaw engine—recognized as one of the best automation systems—will help you confidently navigate the process from choosing an operating system to launching your first process.
Before starting to install the latest version of OpenClaw, you need to decide on your infrastructure. The main computational load falls on remote AI capabilities via provider APIs. However, for 24/7 task execution, the agent requires a stable internet connection. Below is a complete, structured guide to installing the OpenClaw system from scratch.
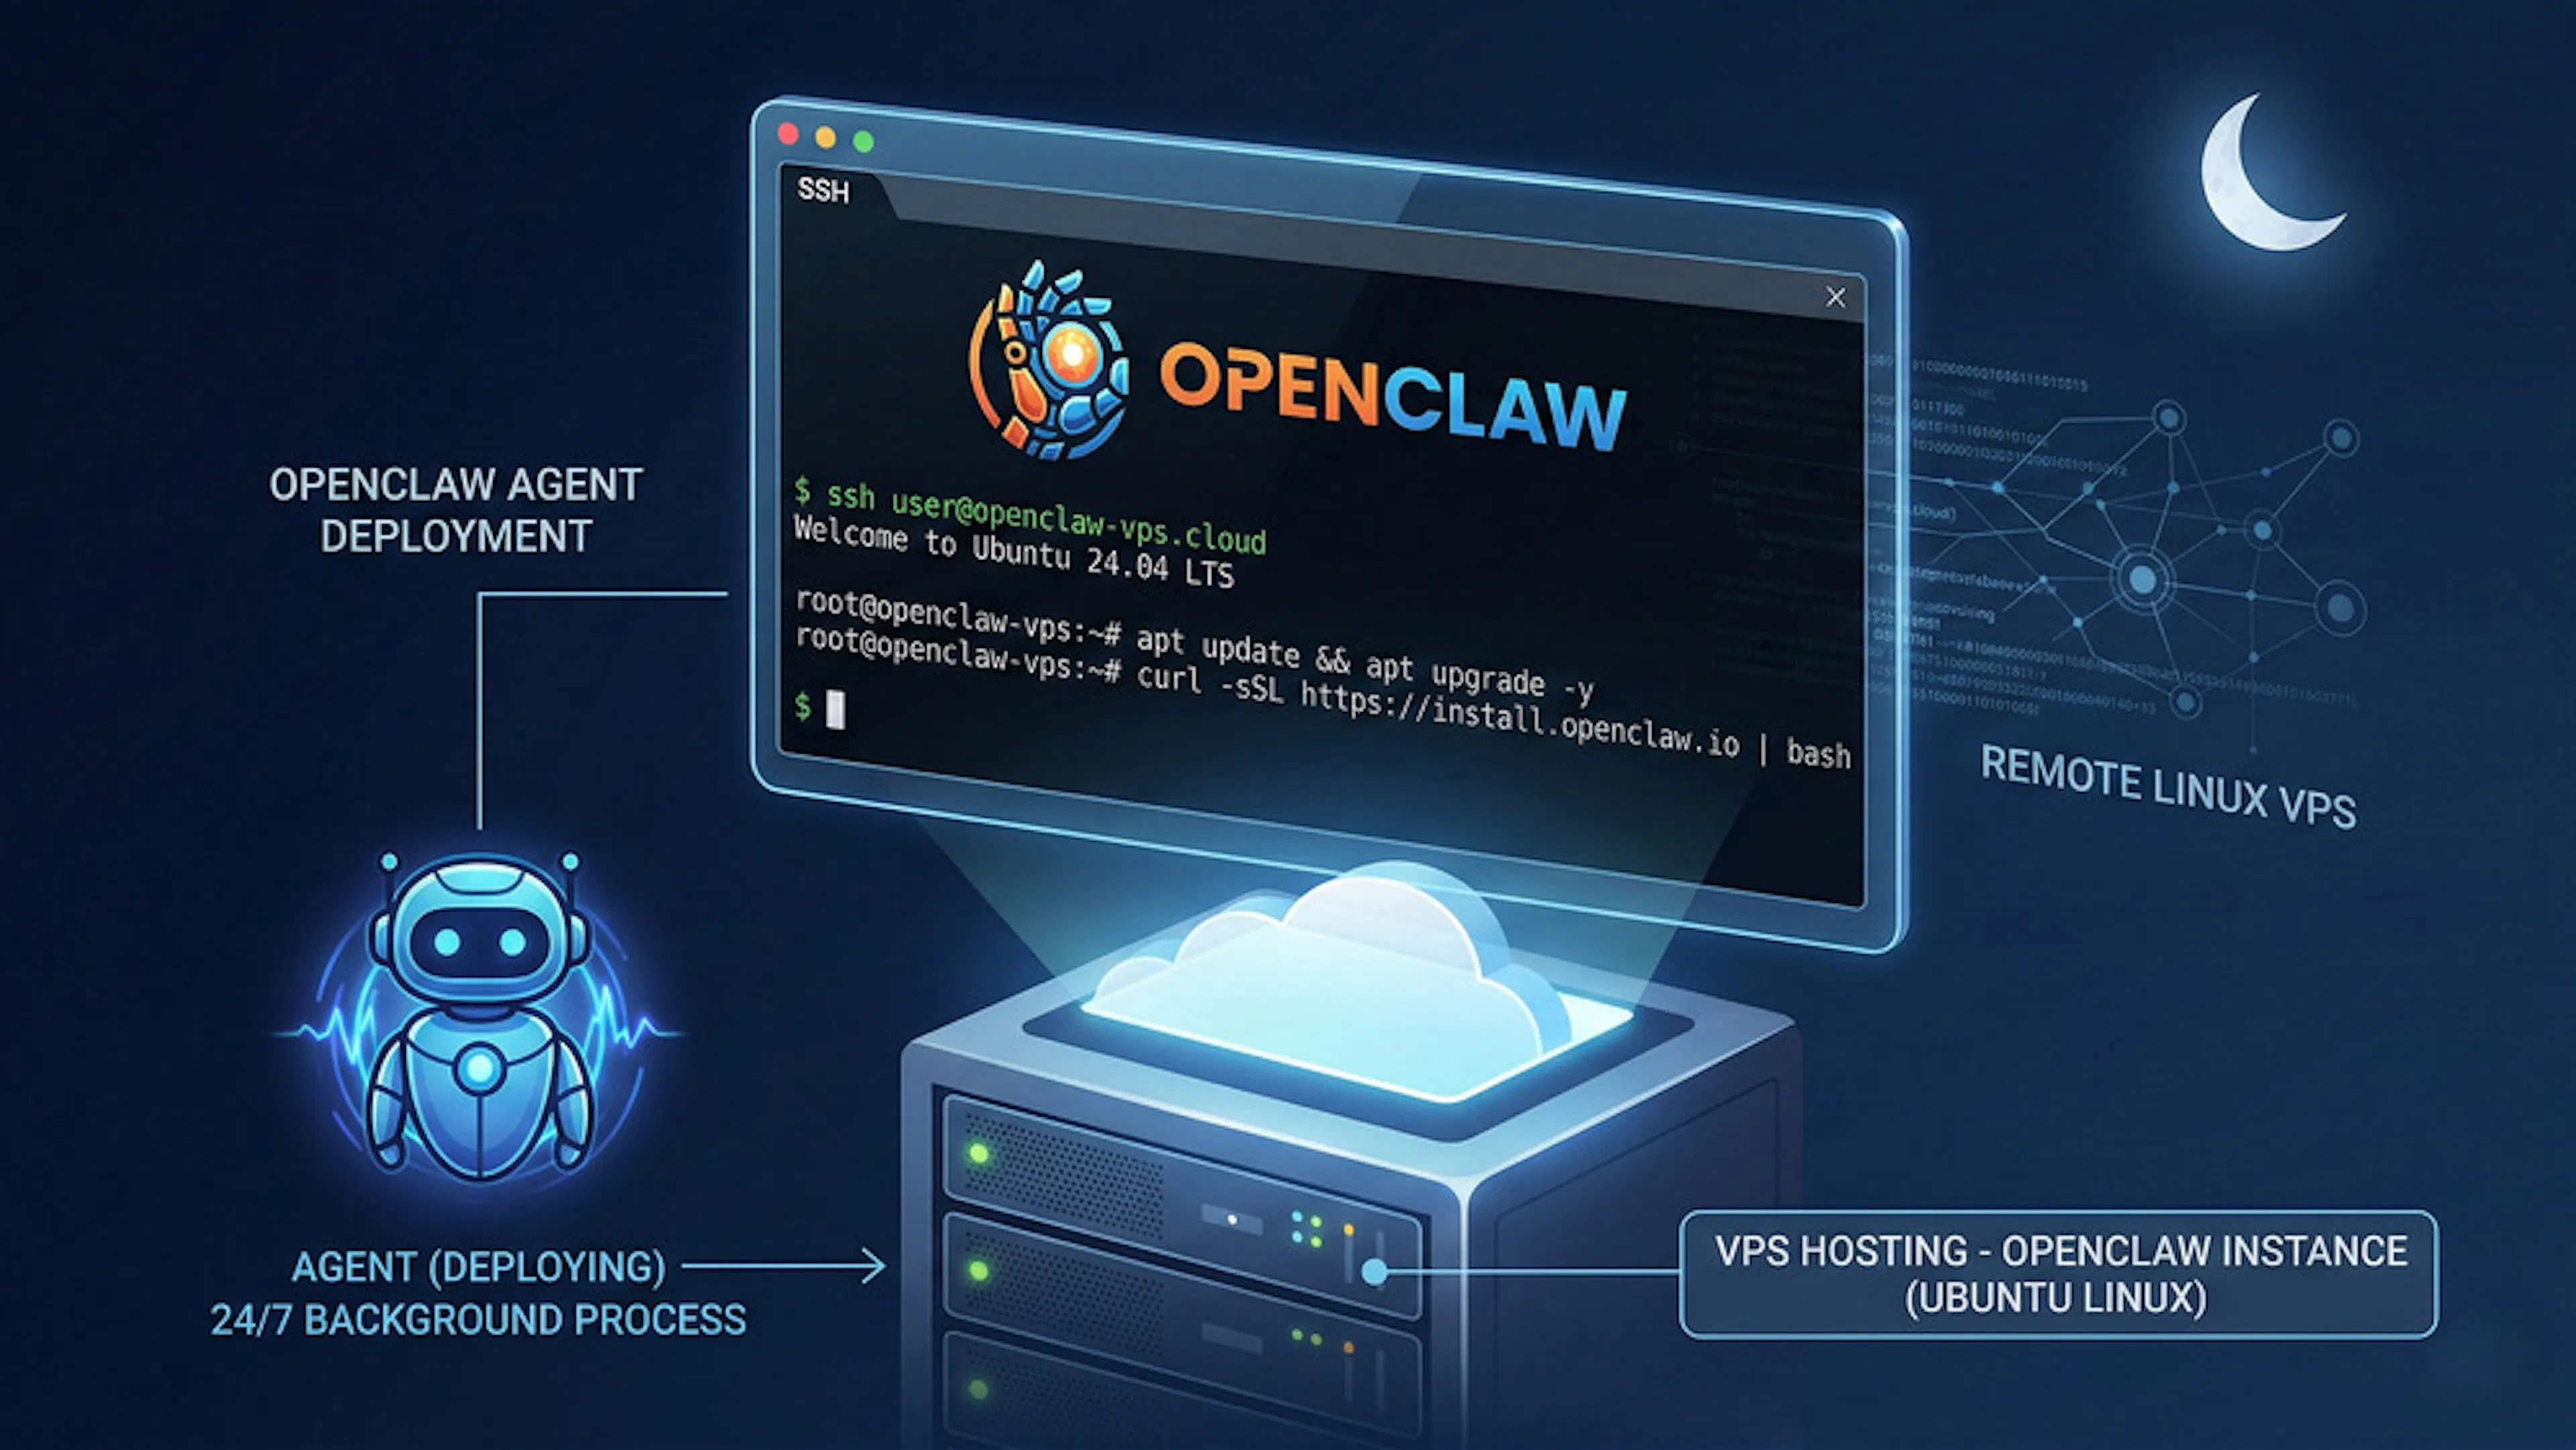
Renting a cloud VPS (Virtual Private Server) is the most reliable and professional choice for ensuring continuous bot availability. Basic Linux distributions (particularly Ubuntu) are ideal for deploying background processes. This server guarantees that your virtual employee will execute scheduled workflows even at night.
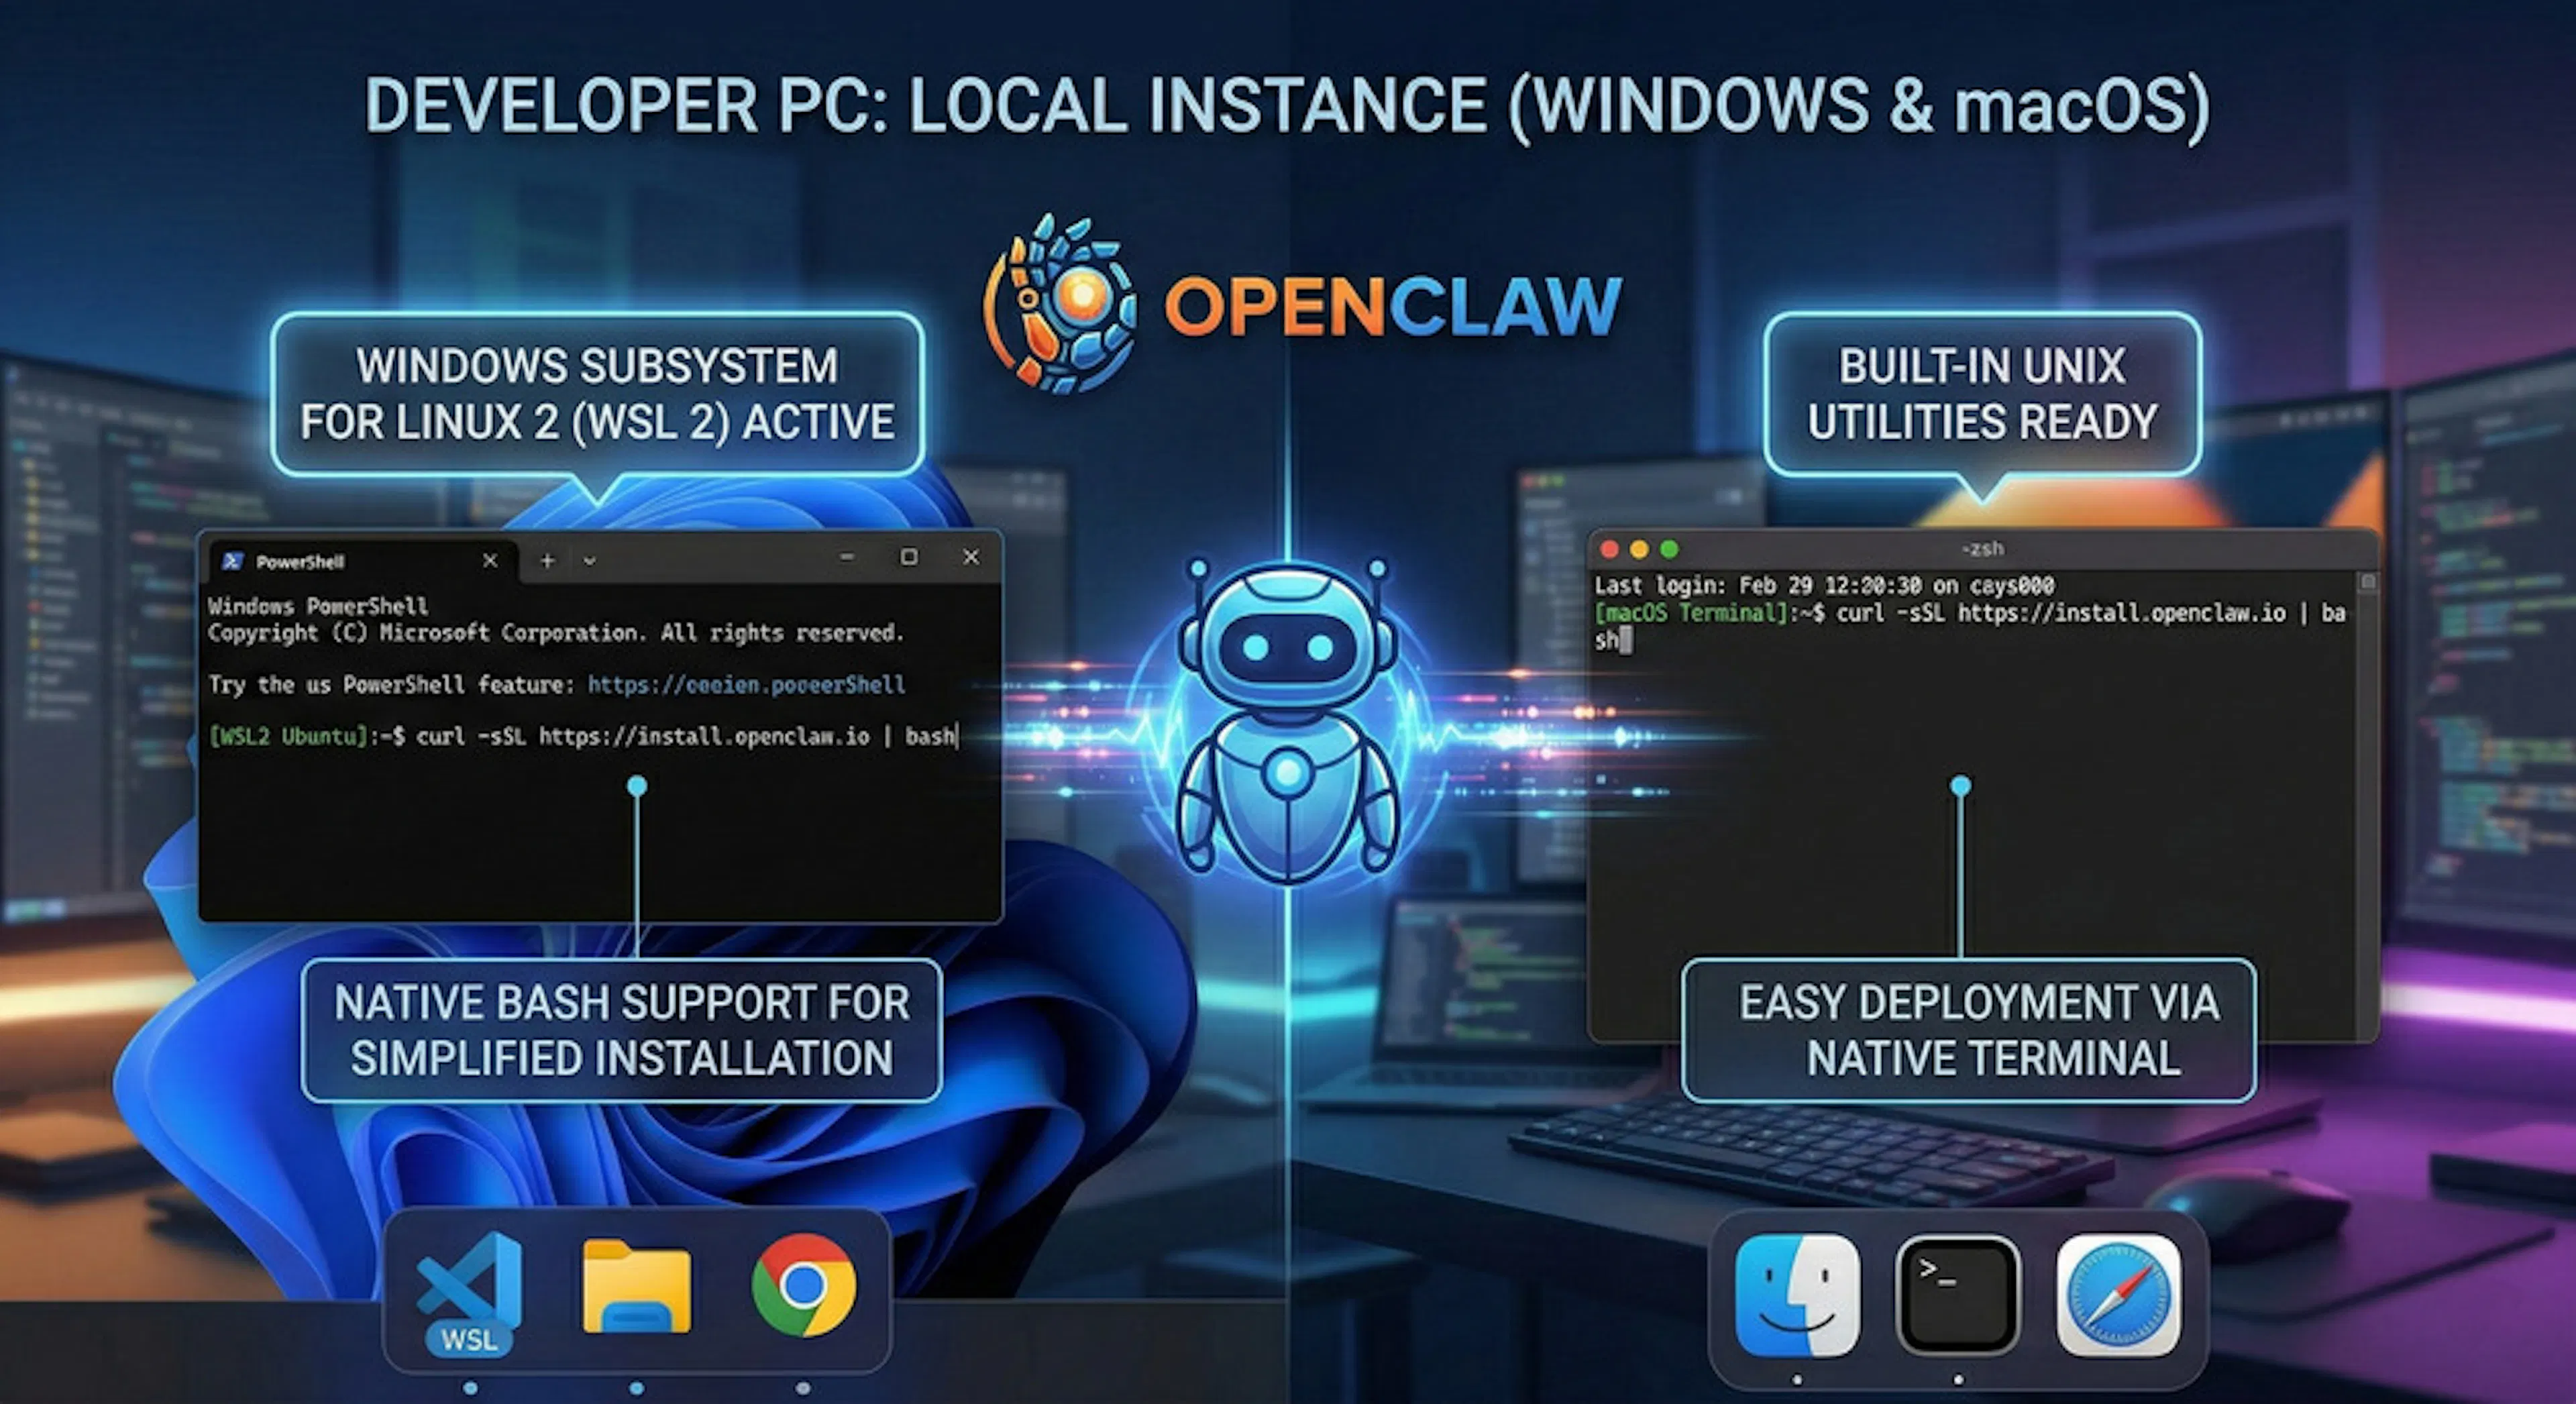
Many developers prefer to test new open-source tools locally on their own computers. If you plan to use Windows OS, technical specialists strongly recommend activating WSL 2 (Windows Subsystem for Linux). Native support for Bash scripts in this environment significantly simplifies OpenClaw installation. For macOS users, the process is also straightforward thanks to built-in UNIX utilities.
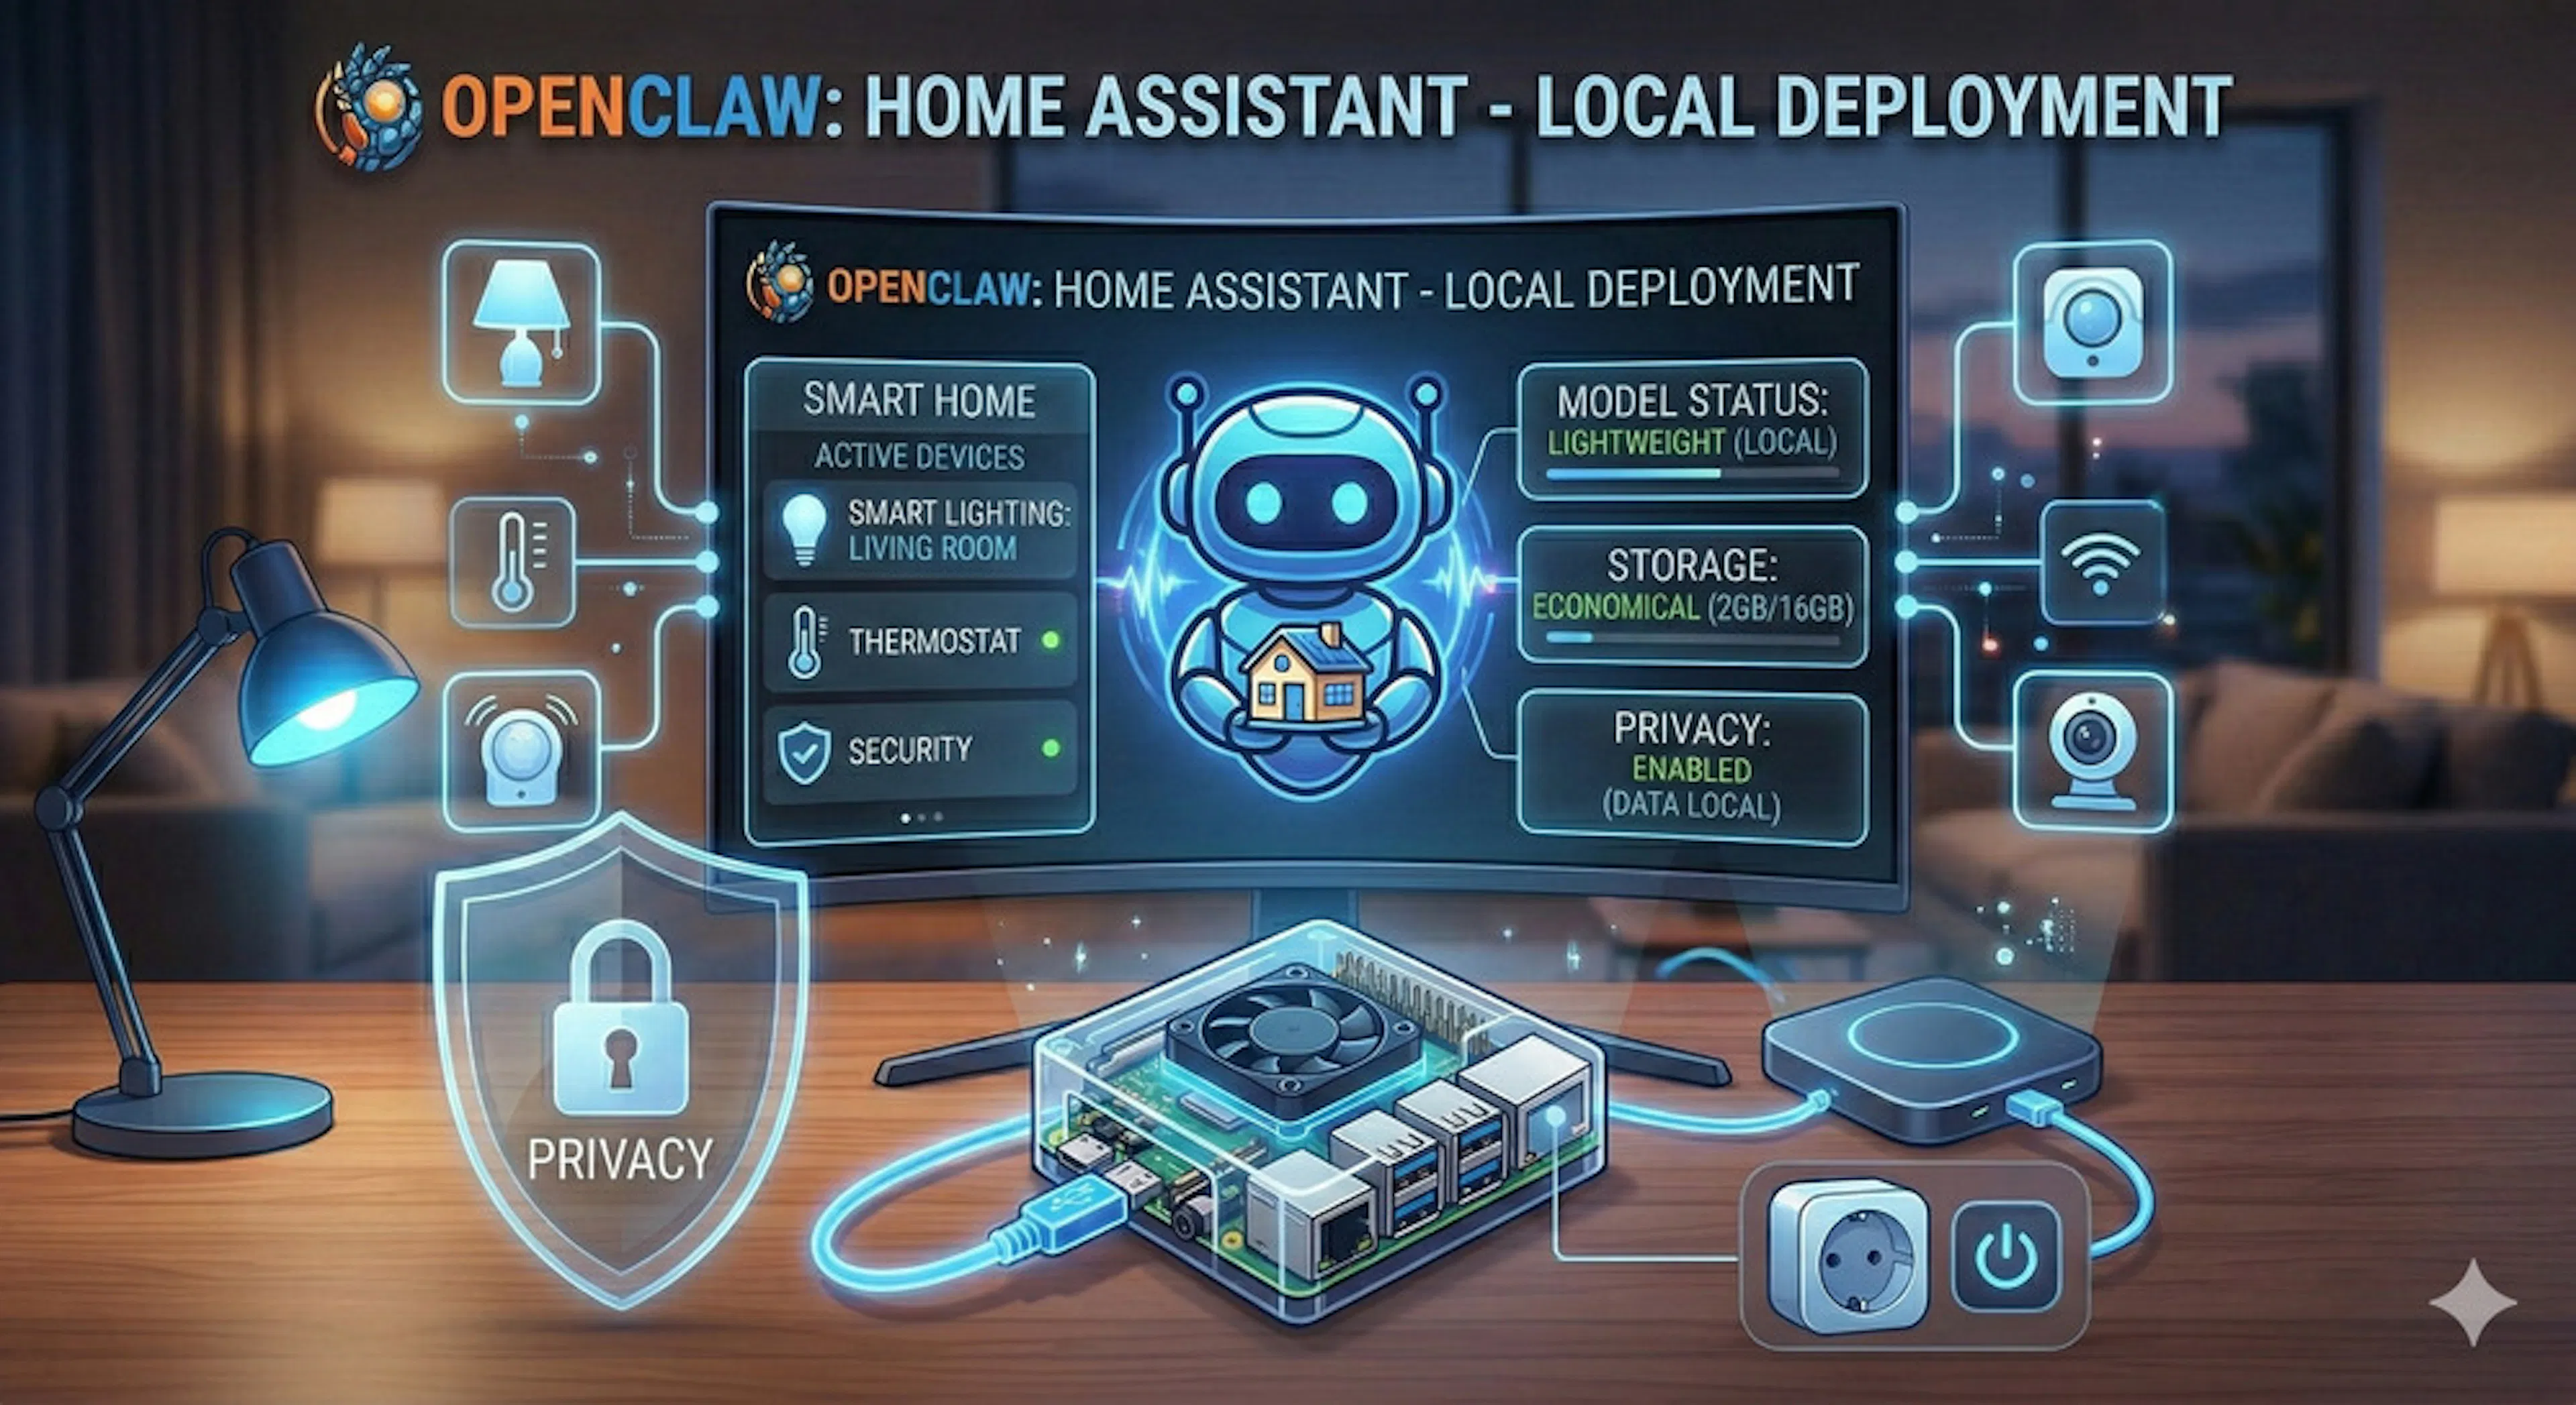
Microcomputers are an excellent choice for integration into home automation systems. Running OpenClaw on a Raspberry Pi allows you to have a fully independent AI secretary. This is an ideal option for users seeking privacy and wanting to run lightweight models locally, saving disk space.
A complete OpenClaw installation requires a basic understanding of the console. If you take the time to learn how to install OpenClaw correctly from the start, the system will function stably and perform background tasks without critical failures.
The core runtime environment for the OpenClaw platform is Node.js and its built-in package manager, npm. First, open your system terminal. Enter the command node -v and press Enter to check the versions. If the console returns an error, manual installation is required. After successfully adding these dependencies, your infrastructure is fully ready to launch the process.
The fastest and safest way to get the latest version of OpenClaw is to use an automated bash script that fetches files from the GitHub repository. In the command line, you need to execute the following command:
curl -fsSL https://openclaw.ai/install.sh | bash
The curl utility with the -fsSL flags downloads the installation package (triggering the install script), and the shell initiates the process of unpacking the OpenClaw files. The installer will prepare the CLI interface for further interaction.
Once the files are downloaded, the basic configuration stage begins. In the terminal, enter the command:
openclaw onboard
This launches an interactive setup wizard that will sequentially request data for connecting to the AI, specifically the language model you choose. If you don't have API tokens yet, you can easily skip any step (using the skip option) and add them later in the config.json file or through the visual dashboard. Completing the wizard means your OpenClaw assistant has been created.
For those learning how to download and configure OpenClaw, it's obvious: without external integrations, the system is just a script and, as of now, can't do anything. For OpenClaw to start providing real value, it needs a "brain" (a language model) and an interface for communicating with the user or other integrations with external services.
The OpenClaw architecture is designed to support various neural networks. Integration with OpenAI (GPT), Anthropic (Claude), or Google provides the highest quality results. The choice of provider depends on the project's specifics, but the engine allows easy switching between different versions, where each model is configured separately to unlock the system's maximum potential.
Where to Get and How to Securely Store API Keys
To legally access the computational resources of neural networks, you will need a unique API token. Many companies offer basic tiers for free, sometimes without requiring a credit card. To get a token, log into your account on the provider's website using a browser. Experts recommend storing keys exclusively in hidden environment variables, avoiding accidental public exposure. Navigate to the platform's settings, copy the secret key, and paste it into the required section. This approach guarantees that your intelligent OpenClaw agent will communicate with external systems securely. Each connected model operates through an encrypted channel.
To manage the OpenClaw platform from your phone, connecting Telegram is optimal. The interface creation procedure happens entirely within the app. Find the official account @BotFather and send it the /newbot command.
Generating the Token and Obtaining the Pairing Code
After registration, the bot will issue a token. In the next step, the OpenClaw initialization utility will generate a special Pairing Code.
Connecting the Agent to Your Account via Gateway
In the OpenClaw architecture, data transmission is handled by the gateway. The mechanism works like this: the user sends a message, the gateway intercepts the request, asks you to approve the action, validates the code, and passes it to the local OpenClaw daemon. Once the pairing is confirmed, your agent is ready to process requests and execute built-in skills.
OpenClaw's uniqueness lies in the fact that personalization parameters are stored transparently—as text files. Personality configuration is done by editing these documents.
The SOUL.md document acts as the fundamental system prompt for OpenClaw. It defines the core personality of the intelligent model: professional specialization, communication style, and constraints. What is written there becomes law for the AI. To change OpenClaw's parameters, open this configuration document. Select the desired block of text in your editor. Experts recommend writing system rules in English, for example: "You are an expert," "do not execute destructive commands," "this behavior is designed for your workflow." This approach transforms a standard script into a specialized OpenClaw employee that functions perfectly via WhatsApp and other messengers.
The second crucial component of the OpenClaw architecture is the MEMORY.md file. Ordinary bots forget details after a session ends, but an autonomous algorithm solves this problem. This knowledge base allows for building long-term context. For example, if you previously set a task to use specific tools, apply a particular formatting mode, or start services in the background, this data is permanently written into OpenClaw's memory. The owner has full access to this document.
Protecting the file system is a mandatory stage of OpenClaw implementation. Incorrectly configuring access rights can lead to serious vulnerabilities.
To keep your virtual assistant available 24/7, it needs to be run in the background. For Linux-based machines, the standard approach is to use system utilities. To enable autostart, use systemctl. Switching the OpenClaw platform to daemon mode guarantees that the program will automatically restart after crashes or scheduled reboots.
To prevent unauthorized use of AI capabilities, you need to activate the Allowlist function in the OpenClaw configuration file, adding only your own identifiers.
Why You Should Never Give the Agent Root Privileges
A fundamental rule of information security is: never run scripts as the superuser. An intelligent model can make mistakes. If the process has the highest privileges, an accidentally generated terminal command could crash the server's OS.
Principles of Restricting Shell Command Execution
The administrator should create a separate, highly restricted user specifically for running OpenClaw. This user must be strictly prohibited from using privilege escalation utilities. It is crucial that the operating system hardware-blocks any suspicious actions. Thus, even if the OpenClaw system attempts to execute a destructive command, the kernel will block the attempt.
Example of Setting Up a Secure Environment (Sandbox)
In practice, creating a secure "sandbox" involves allocating a single isolated directory. The administrator strictly denies access to any system directories. This isolation transforms a powerful but potentially dangerous tool into a reliable and controllable OpenClaw agent.
Since the OpenClaw platform is open-source, most problems are easy to diagnose. Beginners often wonder why the system is failing. Below are the most common issues.
If the pairing code is not recognized, the temporary session has likely expired. Open the terminal and interrupt the current stalled process. Then, re-enter the command openclaw onboard. This error often occurs due to an extra space when copying the token.
A situation where the checkmarks in the chat turn blue but there is no response indicates a broken connection with the language model provider's API. The assistant receives incoming tasks but is physically unable to generate a response due to exhausted limits. You need to visit the model developer's official website, log into your dashboard, and check your balance. Verify the connection is working. If the tokens are fine, try forcibly restarting the process with a run command (or restarting the daemon configuration).
The OpenClaw platform requires an up-to-date version of the Node.js environment. If the console shows compatibility errors, experts recommend using a version manager like NVM. Another common issue is the "port already in use" error. This occurs when a previous OpenClaw session terminated incorrectly. To resolve the conflict, use diagnostic tools to find the process and terminate it forcibly.
Integrating autonomous AI systems elevates corporate and personal efficiency to a new technical level. This comprehensive guide to installing the OpenClaw platform from scratch proves that deploying your own assistant is accessible to any confident user. By strictly following the instructions—from environment preparation to securely connecting language model keys—the software suite guarantees stable background task execution.
The main principle for successful long-term operation lies in paying close attention to information security. Running processes exclusively in an isolated environment on a remote server and strictly avoiding the use of root privileges reliably protect your core infrastructure.
Once the basic OpenClaw setup is complete and potential errors are resolved, a wide field for customization opens up. Editing system prompts and adapting the memory allow you to transform this open-source code into an indispensable digital agent, working 24/7 to deliver results. It's important to remember that the more precisely you formulate your commands, the more effectively the intelligent model works, allowing you to utilize the full potential embedded in the technology. A properly configured model can handle any analytical challenge.

Max Godymchyk
Entrepreneur, marketer, author of articles on artificial intelligence, art and design. Customizes businesses and makes people fall in love with modern technologies.